A crashed computer is more than just resurrecting documents, spreadsheets photos etc. Here’s a plan to help.

It will happen to everyone at some stage. It might not be tomorrow or next week or even next year, but happen it will, and when it does, you need to be a goof little Boy Scout.

Be Prepared.

What is this disastrous possibility you ask? Simple dear reader, a hard drive failure.

The thing is, whilst your data (documents, photos, spreadsheets etc) ARE of course valuable, when it comes to rebuilding a system due to a malfunction, then the time-consuming part is not resurrecting that data.

I bring this up, as just recently I have been through this ‘trauma’ with a trusty 6-year-old Dell biting the dust. This machine has rarely been turned off in that entire time and so has had a hard life, and probably lasted maybe a couple of years longer than I expected. (My previous Dell lasted 4 years. I have used Dell XPS machines for nearly 15 years now I believe and been very happy with them as a whole).

Let me explain exactly what my setup is, and that will give you a feel for what, if unprepared, an almighty task would lie ahead.

The “box” contains a single 4TB drive split into a pair of 2TB partitions with all of the OS stuff (Windows 10 Premium) on the first partition (Drive C) and applications on the second (Drive D). For data, I have a Seagate 8TB USB 3 drive connected.

There is 32GB RAM and 8 USB slots for peripherals, one of which goes to a powered 16 port USB hub.

Why so many USB’s? This is a partial clue as to why reconstituting a system can be so painful!

I have a lot of peripherals I use daily. An awful lot. Here is a list:

If any of the above are not directly plugged in (the mouse for example) then they have a corresponding USB dongle that needs a port.

There are a few other things I dabble with on occasion that also require ports such as Arduino and Rapsberry Pi electronics, and of course there are needs to get data off drones, cameras, phones and so on.

A number of these need device drivers and so of course when rebuilding a system, you need easy access to these.  I back these up in a separate folder, each with a sub-folder for the exact device and meaningfully named to aid in later identification.

Speaking of backups, I use a pair of Seagate Barracudas in a RAID array and powered by a Synology NAS system. I was put onto this by Adam Turner (of Vertical Hold – an excellent techie podcast – fame) and it was quite easy to setup and maintain on my network.

But it doesn’t there of course.

Back in the “old days”, we had floppy disks as masters to our precious programs – later to become CDs and then DVDs. Today everything is mostly downloaded as compressed files (ZIP, MSI and so on) and so to save re-downloading all of these (with exception), I save the masters of these to again separate folders, also meaningfully named.

The major exceptions are those applications that have a Control Panel type system such as Adobe Creative Cloud, Microsoft Office and Maxon where there is no EXE or ZIP file as such, and these systems automatically update, so all you need to do is re-install the master controller and log in.

But then you also have all the plugins and so on you have for these programs, and if you have a Loupedeck CT (if not why not!) the downloaded profiles this uses, which when you boil it down comes down to hundreds, if not thousands of macros and icon images in each profile.

I use profiles from SideshowFX by the way which are both well thought out and dare I say it, beautifully crafted.

So, now knowing all this, even with a fairly regimented storage system of the stuff I need to get a dead machine to rise from the ashes in the form of a brand new Dell XPS becomes a 2 day job, at least to get everything back to the way you want it.

My suggestion therefore is that if you have not planned a resuscitation routine, you do so with some alacrity! Even with the best plans in place, and assuming nothing goes wrong, it’s a bastard of a job, so best make it as easy as possible.

Footnote: What IS interesting is that before it died on the old system, out of the 2TB I had as the OS “boot drive”, I was down to less than 15GB free. The 2nd partition, the D drive, has around 40GB free out of the 2TB. With the new system setup, and almost identical in configuration, my C drive has over 600GB free and the D drive 900GB.

It goes to show how much “rubbish” is picked up as you go along doesn’t it, despite how many times you run disk cleaners, defraggers and so on.


A welcome side benefit …

I always find it interesting when finding new products and then reviewing them when a seemingly unthought of side benefit pops up.

I discovered another of these the other day and I thought I’d pass it on.

As regular readers know, I am a fan of the Loupedeck CT, USB connected controller that with the correct programming, has a whole bunch of buttons, dials, panels and a jog wheel that can be used to control, commands and functions in a program.

Initially, I found it ideal for use with DaVinci Resolve when video editing as an adjunct to my Davinci Resolve Speed Editor console (which as I have said before, for anyone using Resolve, especially with the Cut page mode  is a MUST have).

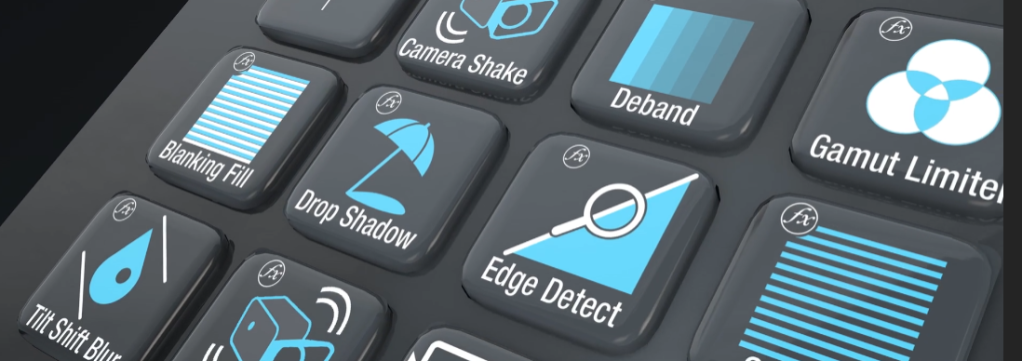
Since then, I have discovered there are 3rd party add on “packs” for the Loupedeck CT (and other consoles such as the upcoming Loupedeck Live S and current Streamdeck) for a whole swag of programs. These include Ableton Live, Logic Pro, Cakewalk and Cubase, Adobe After Effects, Illustrator, Photoshop, Lightroom and Premiere Pro, Cinema 4D and Blender, Final Cut Pro, Microsoft Excel and Word and more, with others under development I understand. The company that makes tghese is called Sideshowfx.

The speed up in workflow is very noticeable using the Loupedeck and I find it far more intuitive than using a mouse to find menu items, or even shortcut keys.

Installation of the profiles / packs is a piece of cake too taking literally a few minutes. And it has to be said, the detail the company has put into the icon artwork is a joy to behold which is not something you can say too often in tech reviews I admit!

But back to the side benefit.

Longer term readers will know that a couple of years back my right wrist went under the knife for an operation to relieve carpal tunnel syndrome. If you are not aware of what this is, it’s a degenerative condition that back in the 80s, everyone sneered at when typists were reportedly getting it in droves (remember this is before every man and his kelpie had a computer on their desk and typewriters and word processors ruled the tech Universe).

It affects a nerve going through the wrist and take it from me, is bloody painful. In my case it affected my right hand typing and mousing in particular as well as giving me a constant feeling that there was a permanently very tight elastic band around my wrist.

Well the surgery fixed it for a period as sadly, as often happens apparently, arthritis setting in after the operation brings other issues, and so once again, using a mouse for any large portion of the day is just a no-no for me.       

Enter the Loupedeck CT and Sideshowfx packs!

With the Loupedeck setup for my left hand and the DaVinci Speed Editor for my right, my actual mouse usage is now minimised for many of my day-too-day applications. And less pain being the consequence, that makes me happy trust me!

The attached photo shows my setup. The only tweak I am going to make is 3D print a “riser” allowing me to put the Loupedeck on more of a tilt.

So if you are getting the symptoms of carpal tunnel, give this a bit of a thought. It’s a small price to pay to save the agony (and maybe even the expense of surgery). And if you do go this way (carpal tunnel or not the Loupedeck and Sideshowfx Packs are brilliant anyway) and want a riser, get in touch and we can work something out.


Using the Loupedeck CT controller. My experience and how I use it.

I first saw information on Loupedeck in 2019 via an advert in a magazine on the shelf in my local newsagent. The particular model in the ad was the original full size Loupedeck+, a console controller apparently much loved by Adobe Lightroom users.

I don’t use Lightroom, and never have, but I was intrigued so asked the company for a review unit.

For years I had been using a Contour ShuttlePro, primarily for video editing as I love the concept of the jog wheel – a throwback to my analogue editing days. I wondered how the Loupedeck+ would fare in the same environment. You can see my initial review here and a revisit here.

Six months later, the company announced the Loupedeck CT, a – to me at least – much more versatile unit than the Loupedeck + due to an open architecture allowing easier 3rd party development of ‘profiles’ for different applications. The Loupedeck CT will switch from profile to profile as you changed between apps in Windows or MacOS.

Using the Loupedeck CT

So how do I use the Loupedeck CT?

It’s necessary to understand the topography of the unit to fully get the picture of what it is, what it can do and then most importantly, how you can effectively use it to speed up whatever workflow you press it into service for, whether it be (as I do) for DaVinci Resolve, Vegas Pro, Premiere Pro, After Effects, Cinema 4D or more than 60 other products, or using profiles you create yourself.

I don’t intend this piece to be a tutorial as such, so here is an excellent video I used to get the hang of creating my own profiles.

https://www.youtube.com/watch?v=D8-Rq5IulBE

The Loupedeck CT is made up of a series of rotary dials, a panel of square touch buttons (showing icons), a panel of square buttons with pre-set labels (A through E and a Function button) , horizontally laid out circular labelled buttons (numbered 1 through 8 via an engraving on the button, and keyboard commands below it such as TAB, CTRL, SHIFT, ALT etc, a second panel of square buttons with labels such as Undo, RETURN and Keyboard layout and finally, a largish jog / shuttle wheel with an LED programmable centre.

Now it’s important to understand that each of these keys / buttons / dials can be programmed with whatever you like. Additionally, there are separate ‘pages’ of commands per button in some case that can be created.

I’ll be using DaVinci Resolve as the example here.

When you first start DaVinci Resolve (assuming of course you have the DaVinci Resolve profile loaded – more on that soon), the touch panels show the 7 options of Resolve that display along the bottom of the program; that is, Media, Cut, Edit, Fusion, Colour, Fairlight and Deliver. Pressing these will take you to the corresponding mode in Resolve just as if you had clicked the option in the program proper.

And now the fun starts and you get to see the functionality and associated advantages of the Loupedeck CT in a working environment. Let’s assume you pressed Edit to take you into full on editing mode, as against using the Cut page. The touch buttons immediately change to reflect a set of commands relevant to this mode. Further, by pressing one of the horizontal number buttons (1-8), you can ‘page’ through all the commands available in the profile that are there for the Edit mode.

The rotary buttons can also be pressed like an on / off switch and then do something totally different.

The DaVinci profile one is so extensive, I think the developers must have mapped every single available command to the Loupedeck CT, including editing, colour correction, all the audio sweetening options and more.

This means that once I understand the logic of the ‘pages’ under each main mode of Resolve, it is much easier to use the labelled icons on the Loupedeck CT to perform an action than use the mouse and the menu systems, or indeed, in many cases, even keyboard shortcuts.

Further of course, if I am switching between programs as often happens, say to get a screen grab for a tutorial or something similar, as long as there is a suitable profile available, the Loupedeck CT will automatically switch to reflect the menu / command structure of that new program.

This speeds up workflow immensely.

Profiles

Now, of course as I say, all this depends very much on the fact there is a profile for your program. In my case, as I use DaVinci Resolve, Cinema 4D and Adobe Photoshop regularly, I have all these loaded. But I also use Microsoft Outlook and Excel, Google Chrome, After Effects, Illustrator and Vegas Pro and there are also profiles for these and even for Windows itself.


Recently, the Loupedeck company setup a Marketplace area on their website so 3rd party developers have somewhere to display the profiles they have developed. The Marketplace is easily accessible directly from the Loupedeck app that is also used to create profiles manually and setup the Loupedeck CT to your tastes.

It’s early days but already there are profiles for YouTube Music, Spotify, Logic Pro, Blender and many more.  You can access it directly in your browser via https://loupedeck.com/loupedeck-marketplace/

The system I use is from a company called SideshowFX. They specialise in making profile packs for controllers including the Loupedeck CT and I have to say, these are a work of art to say the least! Currently Sideshowfx has profile packs for Adobe products, DaVinci Resolve (this is the one I use), Final Cut Pro, Ableton and more.

You can check them out at https://www.sideshowfx.net/loupedeck-products.

Conclusion

It might not be for everyone, but I have found that since getting the Loupedeck CT, my production has increased quite dramatically. You do have to ‘train’ yourself initially to actually use it, and in the early days, you can spend a little time hunting for commands and functions for an application.

But once you become familiar with the ways to access the common ones, your mental library grows in leaps and bounds.

The Loupedeck CT does cost around $850 in Australia through retailers such as JB HiFi, Leederville Cameras and Camera Warehouse and some may say that is expensive.  I’d agree here.

If you make a living via editing video, creating 3D models in Cinema or Blender, or even crunch numbers in Excel though, then the money is well spent in the return of increased productivity over quite a short period of time.

Compared to European pricing at €499 it is about $100 too high in my opinion. That of course is out of the Loupedeck company’s hands though, but it does mean you might get a better deal buying direct from Loupedeck dependent on exchange rates.

And I can say, for me at least, the company’s support when needed has been exemplary.

If you regularly travel and use a laptop away from your desk, then there is also a carry case available for your Loupedeck CT allowing you to take it with you and continue using it with your laptop. Just make sure the Loupedeck app and relevant profiles are installed.

If you have any questions I can answer on using a Loupedeck CT (but not technical please in terms of setting it up etc), feel free to contact me.


Loupedeck CT gets DaVinci update from SideshowFX

One of the best investments I have made over the years is the Loupedeck CT desktop controller which gives me fingertip control over applications such as DaVinci Resolve, Cinema 4D, Spotify, Chrome and more.

Oh I admit, early in the piece there were definite teething issues with drivers, some apps not behaving as they should due to some donkey profile settings and the UI to create your own profiles was not exactly friendly.

But following a few updates later from all involved parties, the Loupedeck CT is now an integral part of my workstation and workflow.

This has been further enhanced in the last few days by a major update from SideshowFX, a Canadian company specialising in customising profiles form the Loupedeck CT and other controllers.

The company just released an updated version of its Da Vinci Resolve package including over 1500 custom made icons and 900 + actions.

To see what you might be missing (and see what profiles you can get for the Loupedeck CT, have a look at the Loupedeck website here and for the SideshowFX custom profiles and icons, see here.

Revisit: Loupedeck CT and Custom Profiles

Any tool is only useful as long as you have the appropriate other things it needs to make it work – a hammer is no good without nails (or other things to bash) or a soldering iron without heat for example.

Similarly, the Loupedeck CT is, by itself, a nice piece of engineering, and to be sure, there is some native app functionality built in, primarily programs from Adobe, Apple and Ableton, but not everyone uses those, so to make it work with other programs, custom built “profiles” are needed.

At launch there were a few available, notably for Microsoft Office programs such as Excel and Outlook as well as Google Chrome, but since then the available library has grown in leaps and bounds. You can see the full list here (and of course this changes as new apps are added).

I currently run a number of custom profiles, and indeed even dabbled in trying to make a few myself, time permitting. Once you understand how it works, its not hard, just a little time consuming.

Custom Profiles I Use

I have had a major commercial set from wwww.sideshowfx.com for Da Vinci Resolve for some time and find these invaluable with the feature set of Resolve so deep and diverse, and well worth the USD$34.99 giving access via the Loupedeck CT to 880 custom actions and 1500+ icons.

Just recently, a profile for Vegas 17 and 18 became available too, so this means I can use the Loupedeck CT with both of my major video editing apps. (For those arriving late, I know Vegas x backwards inside up and downside up and even assisted in some of the earlier documentation. Resolve I have been gradually getting into – and love it).

A MAJOR factor for me in both of these profiles is the ability to shuttle / jog the timeline and trimmers using the Loupedeck’s jog / shuttle wheel. I got used to this way of working back when, as for many years – even decades actually -I had been using a Contour Shuttle Pro, but with the advent of the Loupedeck CT and these profiles, this device become almost redundant.

It was certainly worth its money though and well and truly paid for itself, and even after all this time, is still chugging along without missing a beat.

Also of major use to me is the profile for my 3D application of choice, Maxon’s Cinema 4D. Again this is a program I have been using for many years – around 20 I think – and the Loupedeck profile makes many tasks even easier, faster and more precise.

For fans of Blender, also a 3D application, albeit an open source one and therefore free, there is also a profile, along with Maya LT and 3DS Max.

Conclusion

At €499 (around AUD$799), the Loupedeck CT is not inexpensive by any stretch, but trust me when I tell you that once you get used to using it and it becomes second nature as against hunting commands with a mouse or even short cut keying, it will dramatically increase your productivity and speed up your workflow.


The ULTIMATE system config? (Yes it’s Resolve based with secret sauce added).

I have fond memories of the first time I discovered I could get Microsoft Word and Excel “talking” to each other. For instance, if I created a chart in Excel from a data set – my staff’s sales figures for the week at that time was a good example – then pasted it into a Word document, if the numbers updated, so did the chart in both Excel AND Word.

Thus was the magic of DDE or Dynamic Data Exchange. And from little things, big things grow, to quote Paul Kelly.

This same magic, albeit far more sophisticated these days, is also used to update calendars, phone apps use it, and hell, the entire Internet-cum-Google universe relies on it just about.

So what does this have to do with video and film making?

Well it’s a sidewise lean into describing what I consider to the very best setup available today in terms of the perfect editing system, which I have been trying to put together for years and years.

You see, over the last few months I have been getting more and more into the Blackmagic Design (BMD) ecosphere. Sure, I still use Vegas for quick and dirty stuff as I know it well after 20 odd years.

But for the projects I am now looking at doing, I have the feeling that the BMD way of approaching things, along with some ancillary products, is a better long-term bet.

At the heart of it of course is the Da Vinci Resolve NLE, now at Version 17 Beta 9, and as stable as anything I have seen (so far). As well as the revolutionary Cut page, in the free version you also get a cut-down of Fusion, BMDs 3D / Motion Graphics editor and of course the basic Fairlight audio system and arguably the best program for colour correcting there is.

2021-02-15_16-00-40

If you spend the extra money to get the full version, you also get the BMD Speed Editor hardware controller which I am finding almost indispensable now and the application itself opens up a lot more options to you. At about $550 it is still a bargain..

2021-02-15_15-54-23

Yes, the Speed Editor is skewed mainly to being used in the Cut page section of Resolve, but nonetheless it has certainly speeded up my workflow dramatically.

But I have also added the Loupedeck CT controller.

2021-02-15_15-53-52

And this is further enhancing the system along with the Da Vinci customised profile pack (complete with icons) from Sideshowfx.

2021-02-15_15-56-02

This combination of software and hardware is, to me, brilliant in its own right and while I do have other plugins in the mix too from BorisFX, Red Giant and the like, rounding it all out is the asset logging system from Kyno, and this is where the magic comes in.

2021-02-15_15-59-06

Once you have installed Kyno and pointed it to the directories / folders containing all of your video, stills and audio, you can use the system to search for clips that you may want in your current Da Vinci session. Once found, with a mouse click, they can be immediately loaded into your Da Vinci project.

Various options regarding metadata and folders / bins are also available.

To aid in the search, you can also set folders in Kyno to be “drilled down” automatically when searching for clips.

This in my workflow is the Holy Grail; to be able to search through and find relevant clips and basically throw them into specific bins in a project on-the-fly is as good as it gets.

Try the free version of Kyno and see what you think.


Review: Loupedeck CT

In July last year we looked at the Loupedeck + editing console and then in May this year, the latest from the Finnish company arrived, the Loupedeck CT.

We liked the Loupedeck + very much but lamented the fact it wasn’t as customisable as we’d like; for example getting it to be useful in Vegas Pro was almost an impossibility. If however, you were an Adobe user, then 7th heaven awaited.

All this has changed though with the Loupedeck CT. We had a quick look in May and can now safely say that after an extended play, we find it hard to see how we ever worked without it.

Built in Presets

Out of the box (and the packaging is superb by the way, almost “gift box” level), built in are templates for:

  • Adobe Lightroom Classic
  • Adobe Photoshop
  • Adobe Premier Pro
  • Capture One Pro
  • Streamlabs
  • Final Cut Pro X
  • Ableton Live
  • Adobe Illustrator
  • Adobe After Effects
  • Adobe Audition

… but herein lies the difference between the Loupedeck + and the CT. With the Loupedeck CT, you can also create custom profiles for virtually any piece of software via its  ability to record user actions and adjustments and mapping them.

Custom Profiles

Already available from the Loupedeck website are custom profiles for:

  • DaVinci Resolve (hurray!)
  • Cinema 4D
  • AVID Pro Tools
  • Apple Logic Pro
  • Photomechanic
  • Pixologic ZBrush
  • Blender
  • Serato DJ Pro
  • Steinberg CuBase
  • Izotope RX7
  • Spotify
  • Firefox
  • MS Outlook
  • MS Excel
  • Autodesk 3DS Max
  • Screenflow

Just in the short time we have been evaluating the Loupedeck CT this list has grown for the original 4 or 5 that were available, and no doubt there will be many more in the near future as its popularity grows.

Indeed, I am creating one for Vegas Pro as we speak (and writing a simultaneous video tutorial to show the process). I’d also like to write one for Adobe InDesign if I get the time and inclination.

So what does the Loupedeck CT actually consist of?

Physically it is a panel approx. 15cm square dominated by a 4 x 3 matrix of soft touch buttons at the top, a large LCD dial in bottom centre and various other touch panels and physical buttons around the edges.

All are LCD based meaning they change according to what template is loaded – which is an automatic process sensed by the unit itself via its USB connection to the PC and associated  installed drivers.

(There was an earlier glitch that sometimes the USB connection would drop causing the Loupedeck CT to freeze, but a later driver, for us anyway, seems to have corrected that issue which was known to the company).

One major benefit of the Loupedeck CT is its portability letting you take it with you and / or easily switch between computers – Mac or PC – by the way.

If you create your own presets or custom layouts, there is 8GB of internal memory for storage of them too.

Conclusion

Usage and the value of any device whether it be a keyboard, mouse or a surface control unit such as the Loupedeck CT is very personal. Some will love it, some will find little or no benefit and others will simply hate it.

At the price AUD$899 it is not an inexpensive purchase that you can try before you buy (that we are aware of anyway), so I suggest as well as this one, if you have any interest, read some other reviews on their author’s thoughts – we couldn’t find a bad one out of interest.

Yes, the Loupedeck CT  does take some getting used to, and your software of choice is not on the available template / profile list, you’ll need to make your own (or wait for someone else to), but I think that long term the Loupedeck CT is worth both the price and the effort.

In short, in one package, the developers have brought together a device that combines the control of your photo, video, design and music software together.

And the build quality, as you might expect from the Finns, is superb as you might expect from the people who brought us the wearable heart rate monitor, the sauna and the web browser!

For more information (and to purchase if you wish), go to the Loupedeck website at https://loupedeck.com/en/